This guide will walk you through the process of creating a new group, assigning group managers, and adding users or employees to it.
Step-by-Step Instructions
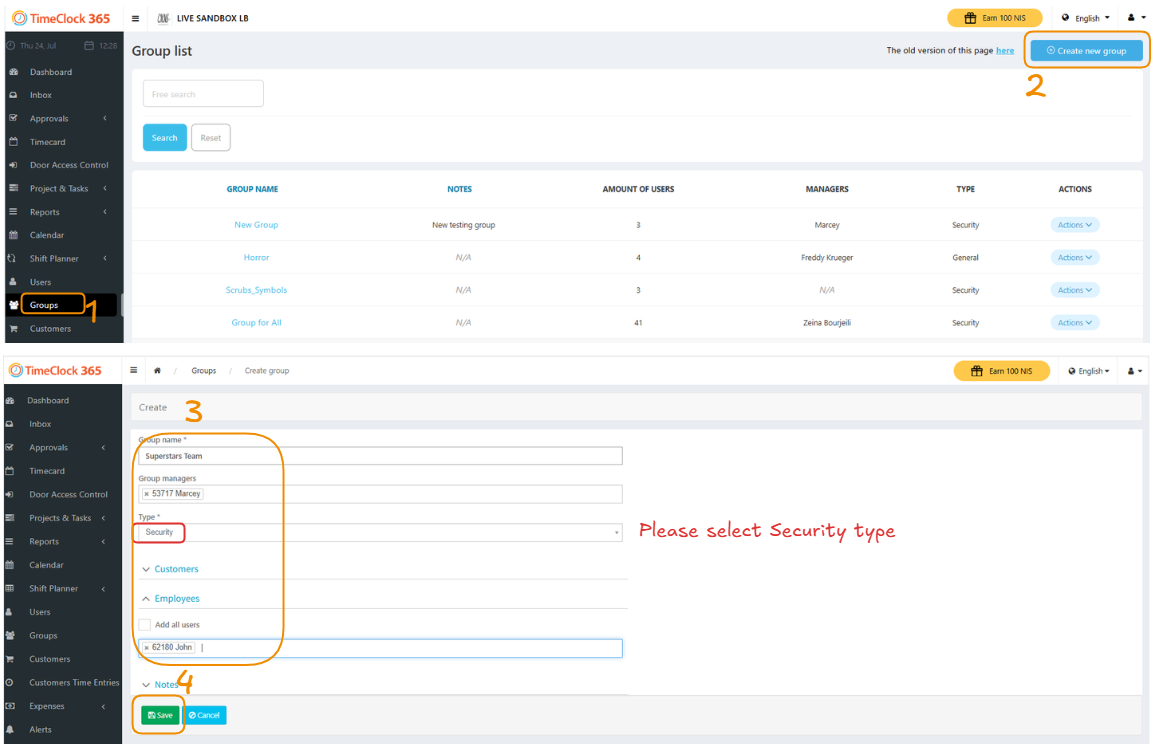
Step 1: Navigate to the Groups Section
First, locate the main navigation menu on the left side of your screen and click on the Groups tab.
Step 2: Initiate Group Creation
On the “Group list” page, click on the Create new group button, located in the top right corner.
Step 3: Fill in Group Details
You will be directed to the “Create group” page. Here, you need to fill in the following information:
- Group name: Enter a descriptive name for your new group (e.g., “Superstars Team”).
- Group managers: Select one or more managers who will be responsible for this group.
- Type: Choose the “Security” group type from the dropdown menu.
- Add all users or particular Employees: If you don’t want to add all users, you can search for and add specific employees to the group, then save.
Step 4: User Permissions (Crucial): Go to Users, edit the user profile, and change the role from “Employee” or “Employee Editor” to “Group Manager”.