How to approve your timesheet (Employee)
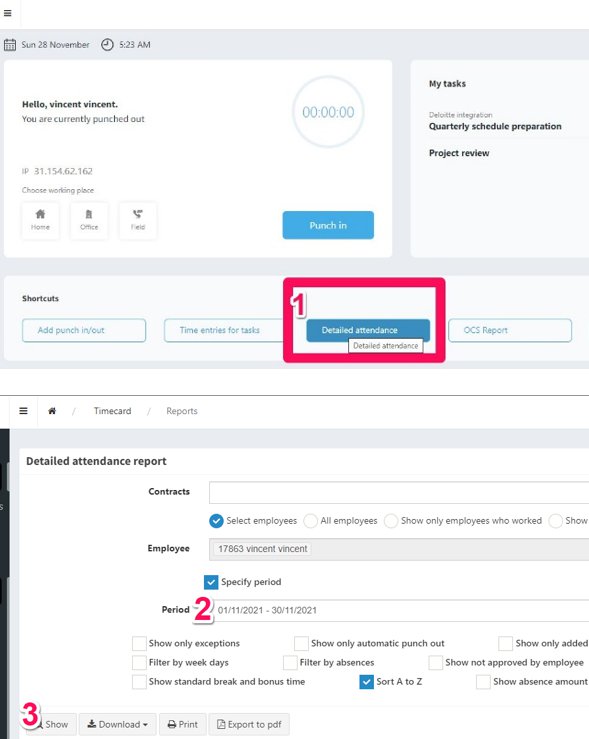
1.Log in to your Timeclock365 account and click the “Detailed attendance” shortcut, then choose the period you’d like to approve and click “Show”

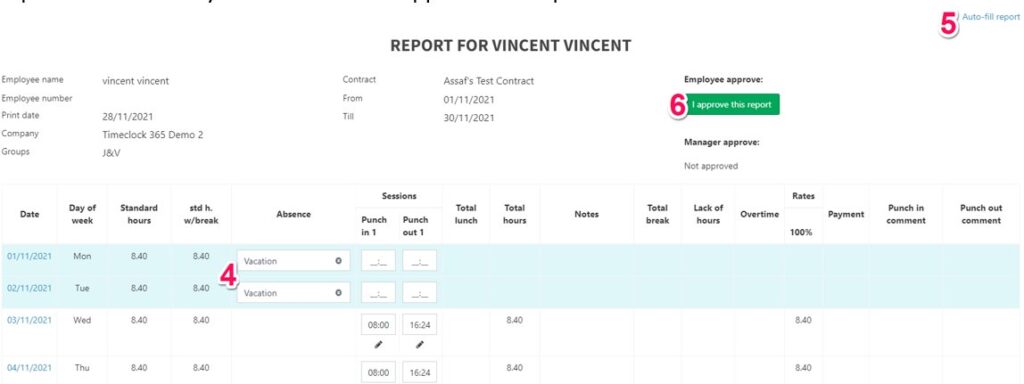
2. Fill in all your days of absence -> click “Auto-fill report” to automatically populate the workdays -> Click “I approve this report”.

Common Problems with Timesheet Approval
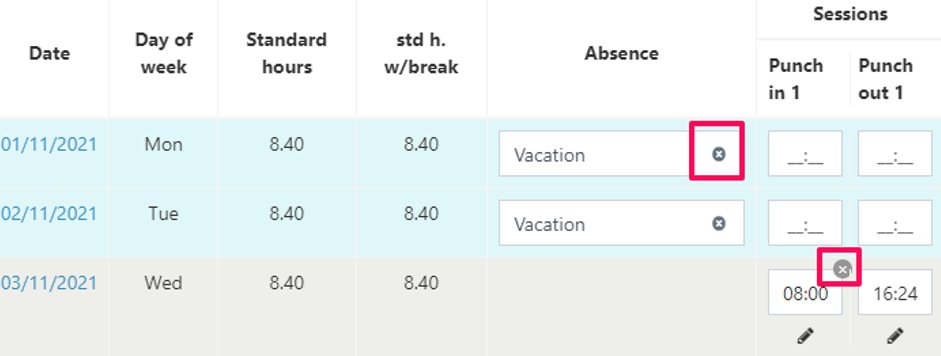
- If you need to correct an entry, either making an absence day into a workday or vice versa, click on the “X” and it will delete this entry.

- After approving your report it will be locked for changes. If you need to make a change after approving it, let your manager know so that he/she will decline to unlock it.
- If you took a half/partial day off, click that date -> On the Pop-up window click “+Add another event” -> Enter your work attendance hours -> Enter your absence hours-> Select the absence event -> Save.
