How to Edit Your Timesheets (Detailed Attendance Report)
As an employee, you can edit your attendance records if you have the required permissions. This allows you to correct time entries, change attendance types, or submit time off.
1. Accessing the Timesheet Editor
1.1. Log in to your TimeClock 365 account.
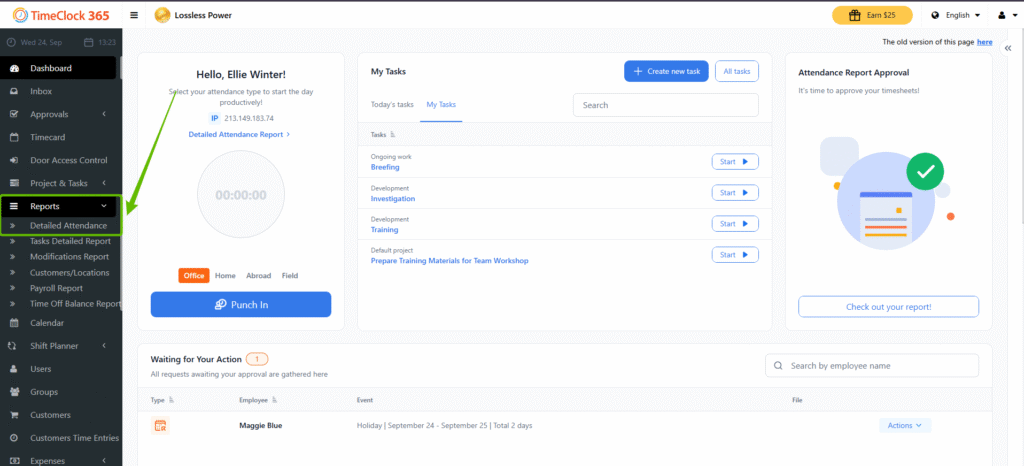
1.2. From the left-hand menu, click Reports and select Detailed Attendance
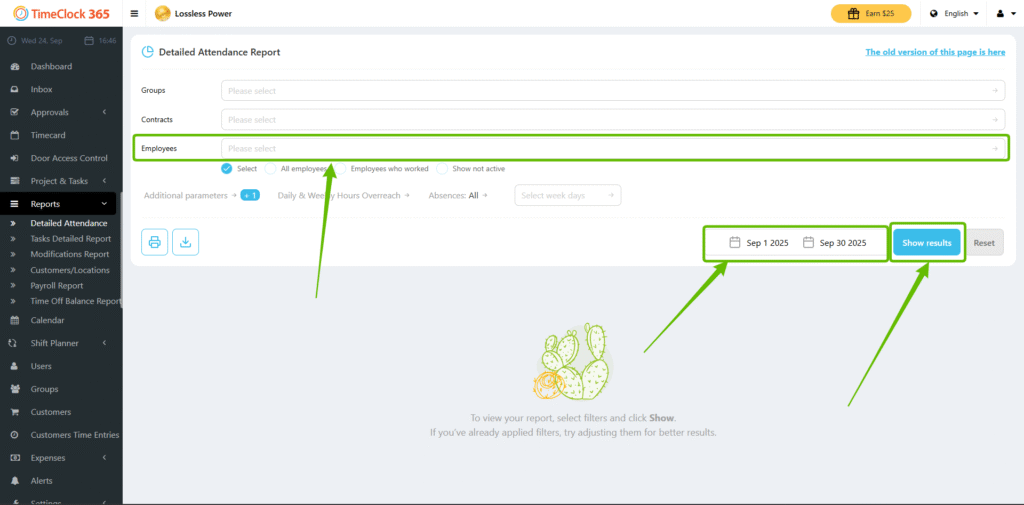
1.3. Select yourself, confirm the period, and click Show Results. The system will display your Detailed Attendance Report (timesheet).
2. Making Quick Edits
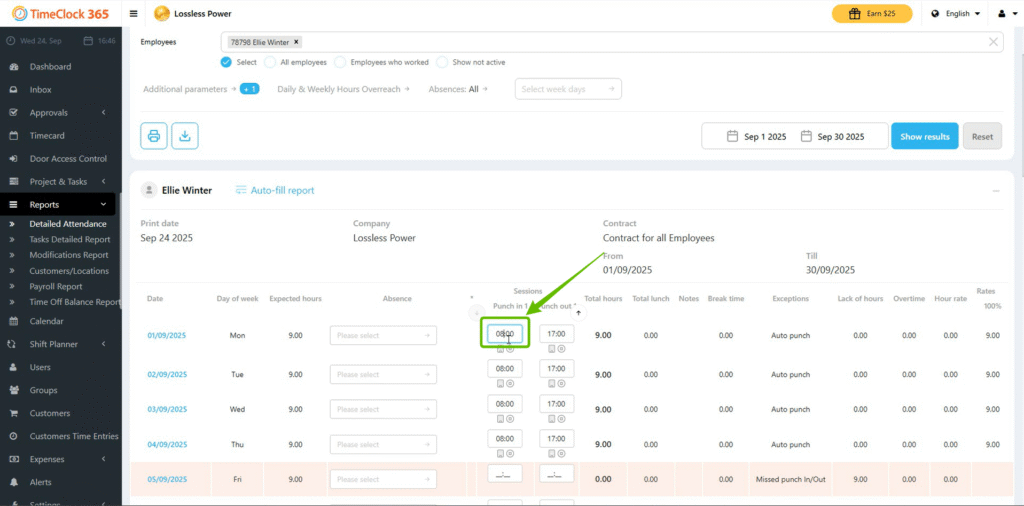
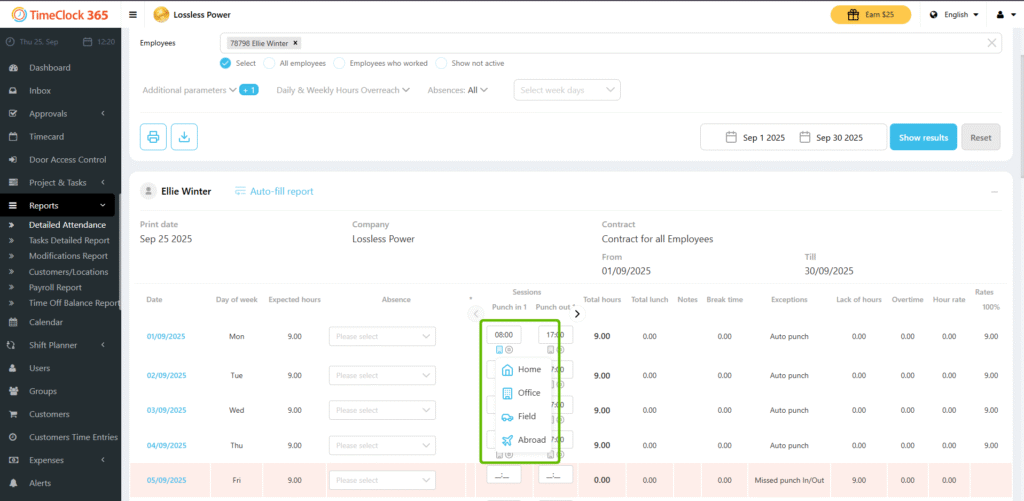
2.1 To correct a punch time: Click inside the time field (e.g., “Punch In”), enter the correct time, and click outside the field to save automatically.
2.2 To change the attendance type: Click the current type (e.g., “Office”) and select the correct type from the dropdown list. The change saves instantly.
3. Using the Advanced Edit Window
For more detailed corrections or to add notes:
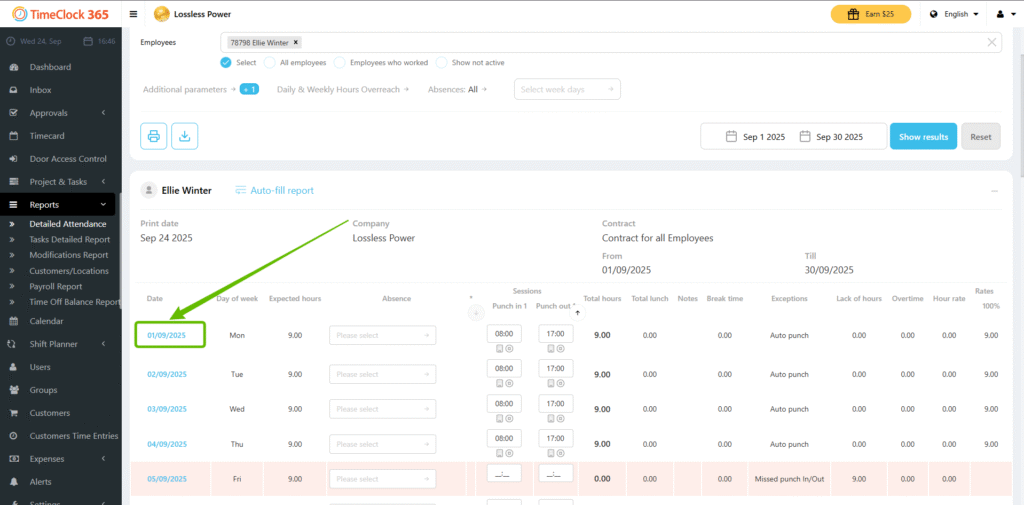
3.1. Click directly on the date you need to edit in the timesheet.
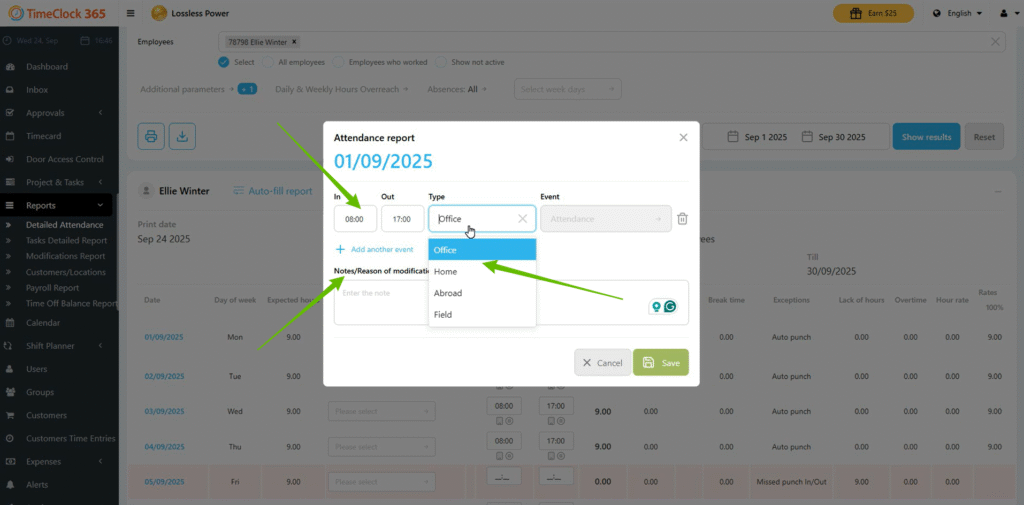
3.2. A pop-up window will appear. Here you can:
– Adjust punch times.
– Change the attendance type.
– Add a note explaining the change.
4. Adding a Time Off or Additional Time Entry
You can add a separate entry for a time off or a second work session on the
same day.
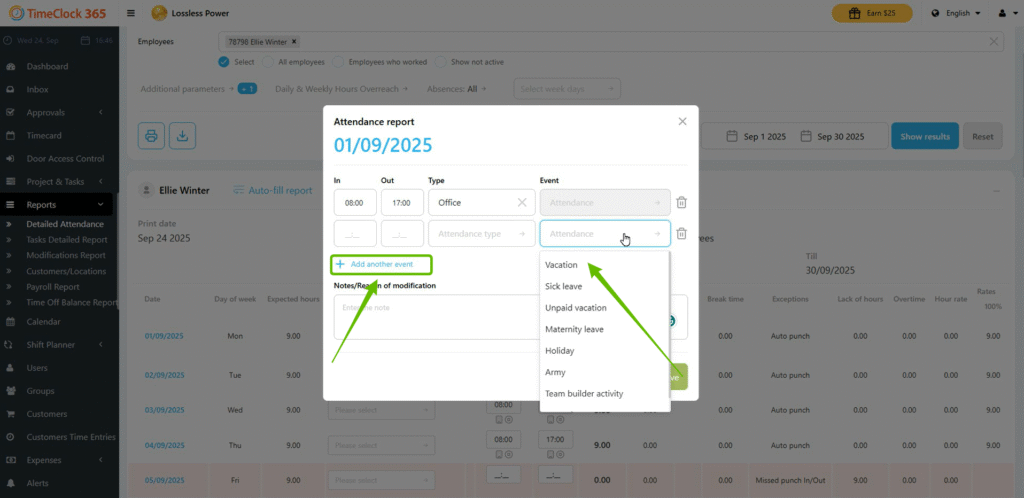
4.1. In the advanced edit window, click Add Another Event.
4.2. Select the type (e.g., Sick Leave, Vacation).
4.3. Choose the duration: Full Day, Half Day, or specify custom hours.
4.4. Click Save. Your timesheet will update immediately.
