
The Time Off Management module lets you accrue vacation days and display leaves on a calendar.
To add this module to your account, go to Billing > Subscriptions, scroll down to Add-Ons and purchase the TimeClock 365 Accruals Manager. See also the updated guide: Accruals explained.
Step 1: Enable
To track the time off balance:
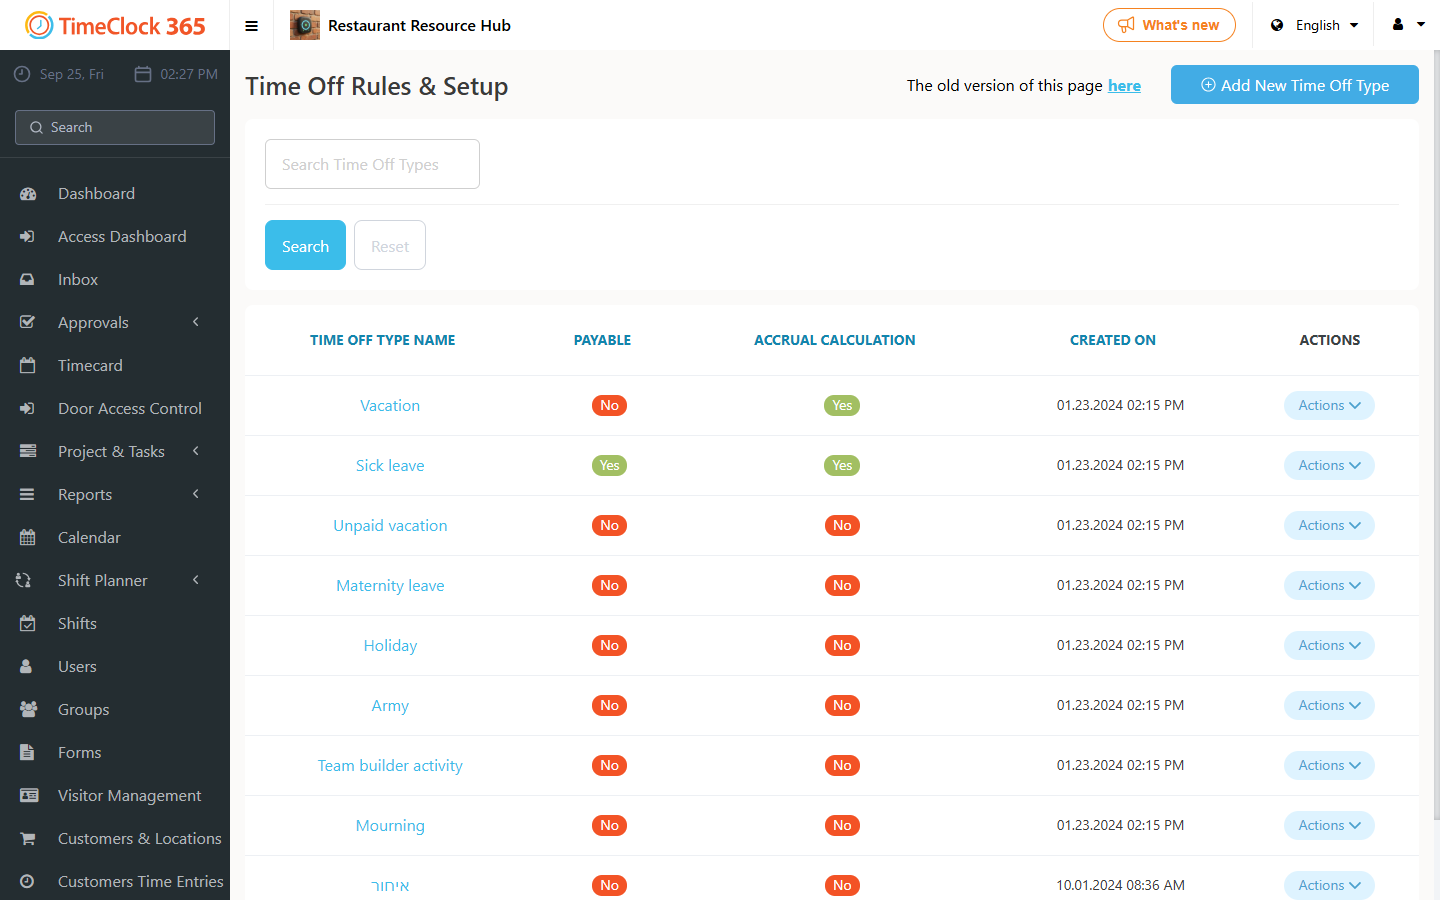
- Go to Time Off Settings and open the time off type.
- Check Advanced settings in contract and Advanced settings in user card for the types of time off you want to accrue days for.
- Click Update.
Step 2: Configure
Accruals can be configured on three levels:
- Company (with the option of a tiered, tenure-based accrual)
- Contract
- User
If an accrual schedule is entered in the user profile, the system uses it. If not, it uses the user's contract, and if nothing is entered there, it uses the company settings.
2.1 Configure a tiered accrual schedule for the entire company
This is the recommended setup, as it best represents a company policy for tenured employees.
- Go to Users, choose a user and fill in the initial work date (employment start date). Do this for all users.
- Go to Time Off Settings and open the time off type. In Accrual mode, set the period, and in Accrual schedule, enter the number of days added at the end of that period.
- Click +Add new tenure bonus to set the additional accrued days for each year of tenure.
Example:
- First year: 1 day per month
- Second year: 1.2 days per month
- Third year: 1.4 days per month
- Fourth year onwards: 1.6 days per month
2.2 Configure an accrual schedule per contract
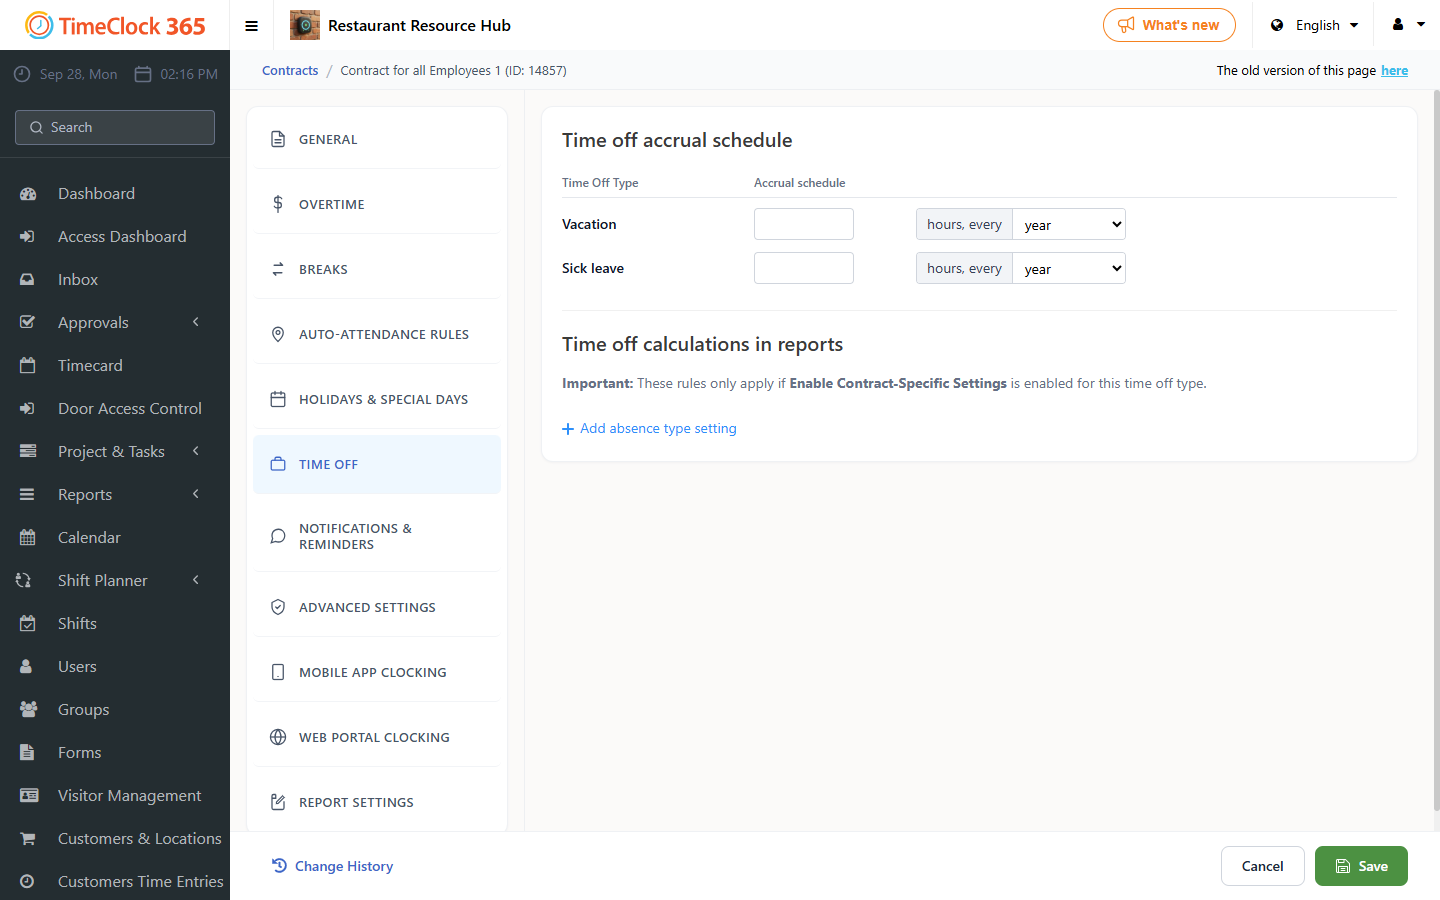
- Go to Contracts and choose a contract.
- Open the Time off tab and fill in the accrual schedule for the employees in that contract.
2.3 Configure an accrual schedule per employee
- Go to Users and select a user.
- Open the Time off tab and, if needed, change the accrual schedule for this employee. For example, to accrue 1 day per month, write "1" and select "month".
- To top up the balance, click settings > Add new update, then enter the date of the change and the number of days.
Step 3: Show the available balance and download the report
When submitting a time off request, employees can see their current balance.
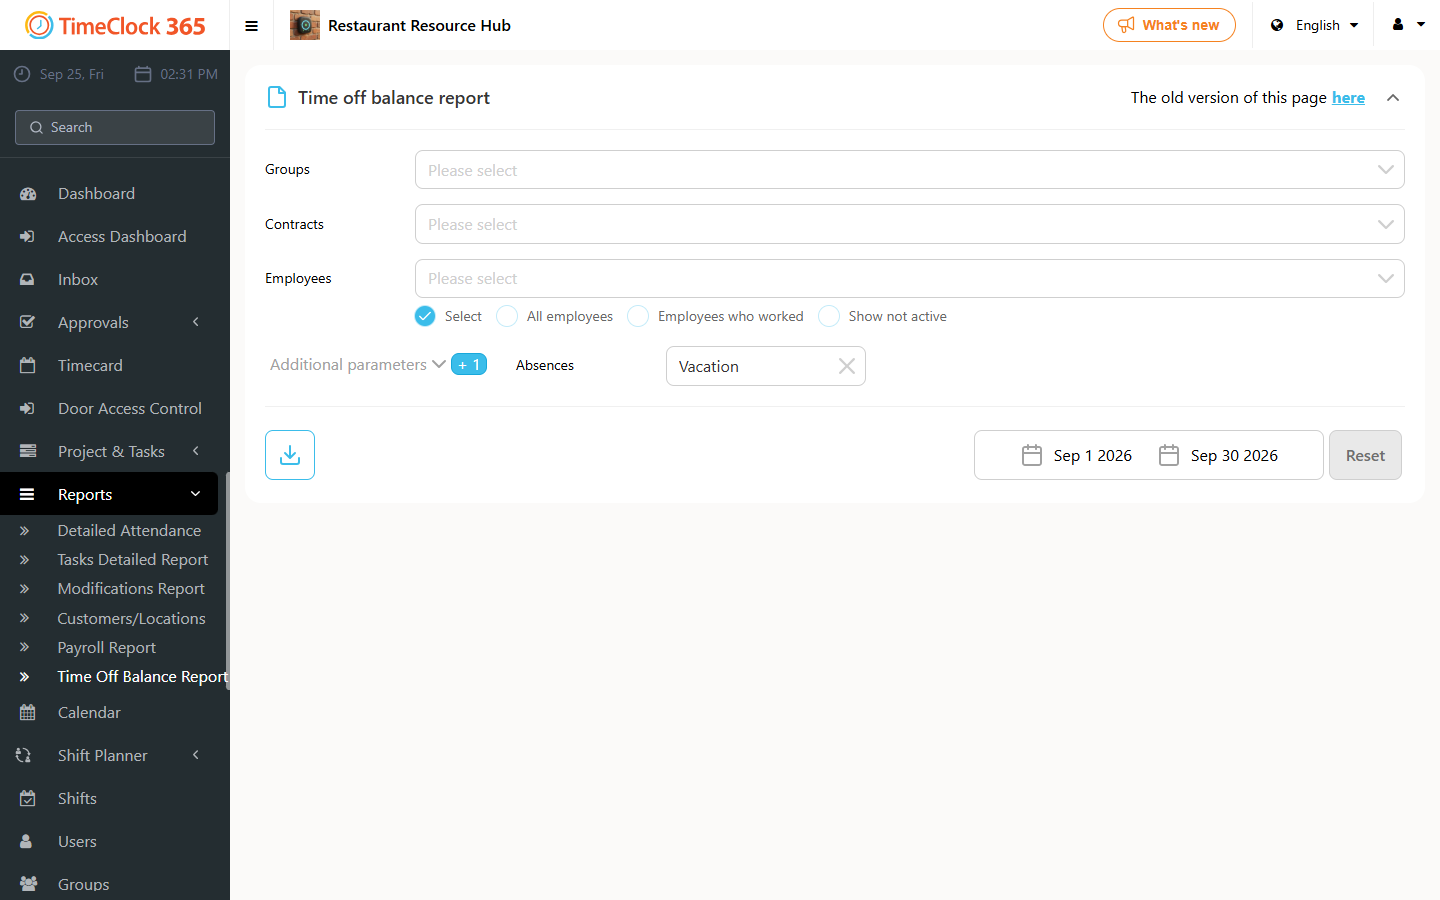
To view the report, go to Reports > Time off balance report, select the employee(s), period and type of time off, then click Download.
You can also view the accrual and usage history by employee. Uncheck Specify period and select the range of dates you want to see.
Step 4: Time Off Calendar
This screen lets you view time off requests across the company, groups and more, so you can manage your employees more effectively.