
The Expense Manager lets you submit work-related costs (such as travel, meals or office supplies) directly through TimeClock 365. Once submitted, your manager can review the request and approve it for reimbursement in your next payroll cycle.
1. Submit via the mobile app (recommended)
The mobile app is the fastest way to submit expenses, as you can use your camera to capture receipts instantly.
- Open the app, go to the main menu and select Expenses.
- Tap the (+) icon to create a new request.
- Tap the camera icon to take a photo of your receipt, or upload an image from your gallery.
- Enter the details: the total amount and currency, the category (for example, Travel, Meals, Fuel), the date the expense occurred, and a short description (for example, "Lunch with Client X").
- Tap Send for Approval.
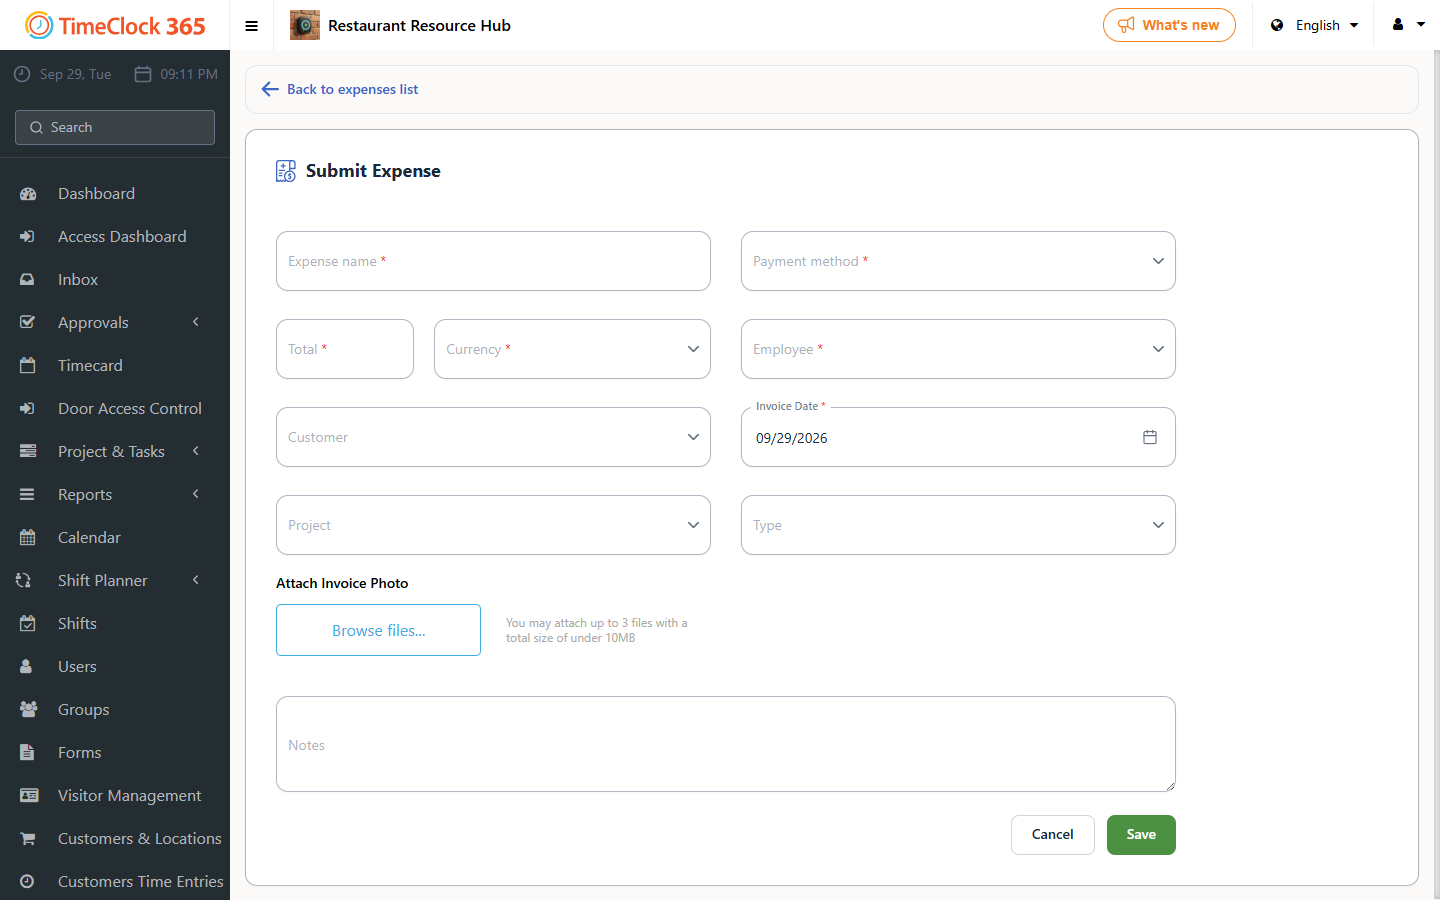
2. Submit via the web portal
If you are working from a computer or have digital invoices (PDFs), use the web interface.
- Go to the Expenses tab in your TimeClock 365 dashboard.
- Click Submit new expense.
- Attach your PDF invoice or image file.
- Complete the type, project (if applicable) and total amount.
- Click Submit.
3. Track your expense status
You can track the status directly in the system. Your expenses are marked with one of these labels:
- Pending: your request was sent and is waiting for manager review.
- Approved: your manager verified the expense. It is now queued for reimbursement.
- Declined: the request was rejected. Check the Comments section to see if your manager asked for more information or a clearer receipt.
4. Tips for fast approval
- Clear photos: make sure the date, vendor name and total amount are clearly visible on the receipt photo.
- Project linking: if the expense is for a specific client, select the correct project so costs are billed accurately.
- Don't lose receipts: submit your expense as soon as it happens.