
This guide explains how to apply a management hierarchy in your company using Groups, so group managers can edit and approve their employees' reports and approve time off requests.
Step 1
Go to Groups, then "Create new group".
Step 2
Fill in the group name, choose a group manager and the employees. Leave the group type as "Security".
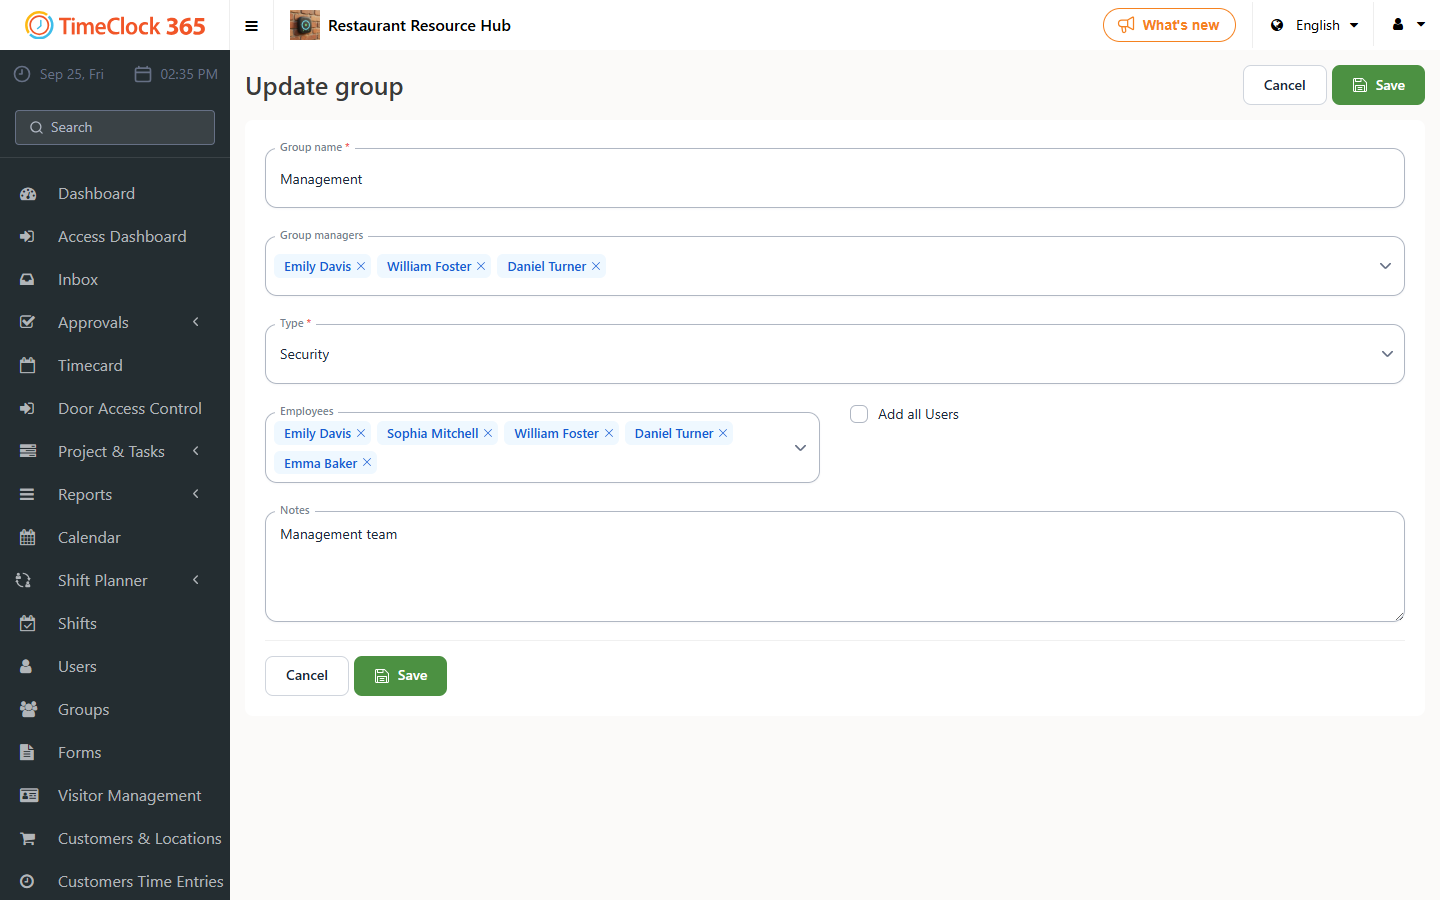
Note: group managers also need the matching role. Go to the user's card and select the Group Manager role.
You can select one or more group managers, and add all users or only particular employees to the group. To give a user the Group Manager role, go to Users, edit the user and change the role from Employee or Employee Editor to Group Manager.
If a user is set to the Administrator role, they can already see everyone, so there is no need to change them to Group Manager, since that would reduce their access to other modules and features.
You can also combine several employees under one group and assign that group in multiple places in the system to make managing them easier (for example, adding an employee to a group linked to a clock device will let them clock in through that device), or use the "Group" filter to show only what's relevant to employees in that group.
Places in the system where you can filter or select a group:
- Approvals - filter by group
- Reports - filter by group
- Alerts - assign a group to an alert
- Work agreement - assign a group to an agreement
- Tasks - assign a group to a task
- Clock device - assign a group to a clock