
With the self-registration link, HR doesn't need to type in a new employee's details. You send the new hire one link, they fill in their own personal, ID and bank details online, and they appear in your Users list ready for you to review. This makes employee onboarding faster and avoids typing mistakes in payroll data.
Available on all plans.
How it works
- HR copies the self-registration link from the Users page and sends it to the new employee (email, WhatsApp, SMS or any chat).
- The employee opens the link on a phone or computer and fills in the registration form, including a scan or photo of their ID or passport.
- The employee clicks Submit.
- The new employee appears in the Users list highlighted in yellow. HR reviews the details and completes the setup, for example the group, contract and licenses.
Step 1 - Copy the link
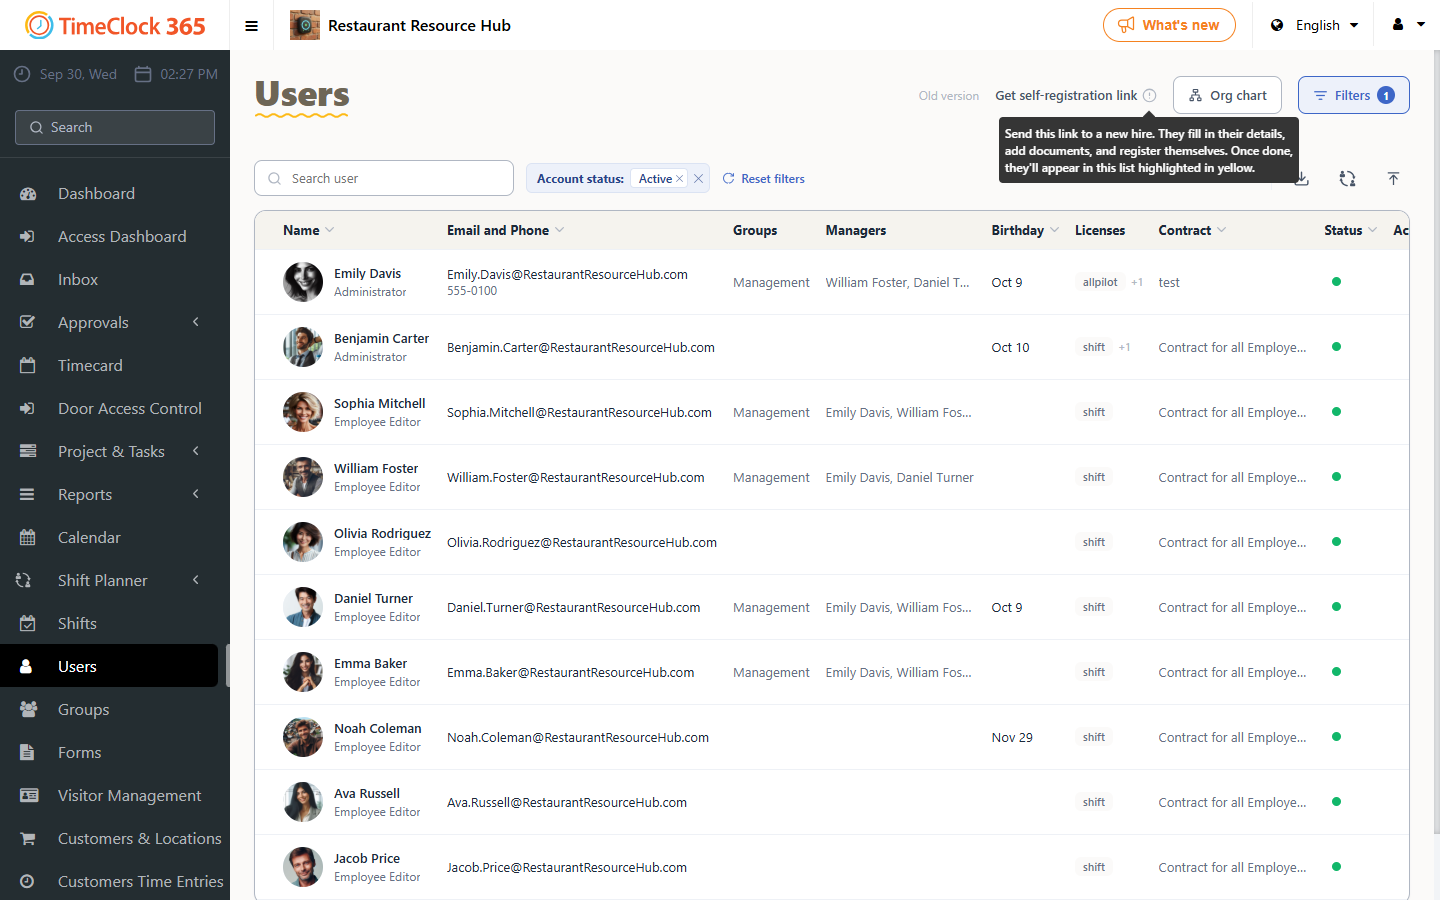
- In the menu, click Users.
- At the top of the page, click Get self-registration link. The link is copied and you'll see Link copied!.
- Paste the link into a message to the new employee.
Step 2 - The employee fills in the form
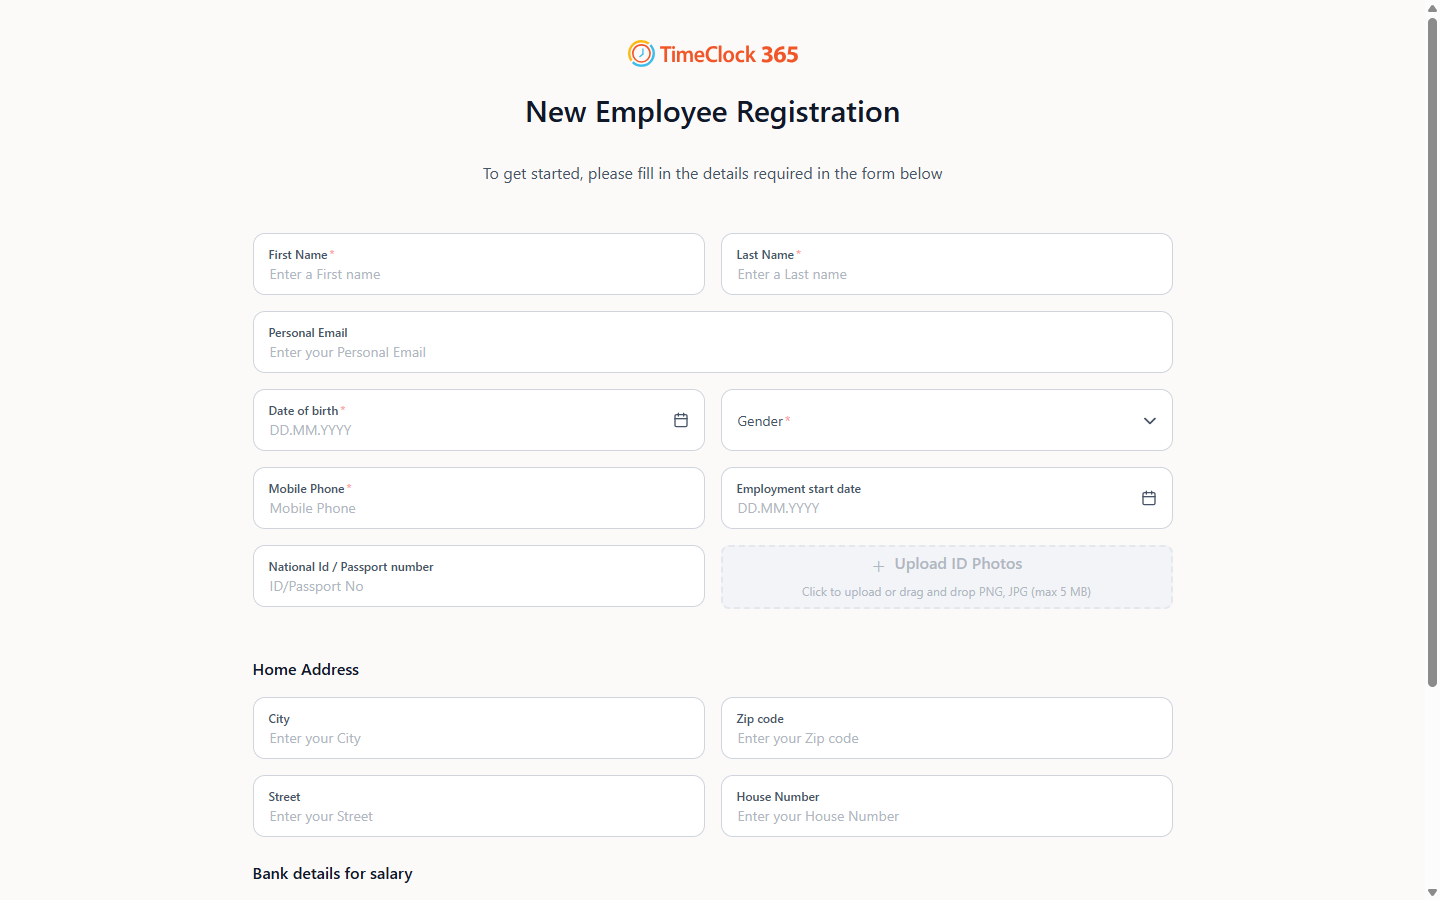
The link opens the New Employee Registration form. Fields marked with * are required.
Personal details
- First name* and last name*
- Personal email
- Date of birth* and gender*
- Mobile phone*
- Employment start date
- National ID / passport number
- Upload ID Photos - a scan or photo of the ID card or passport (PNG or JPG, up to 5 MB)
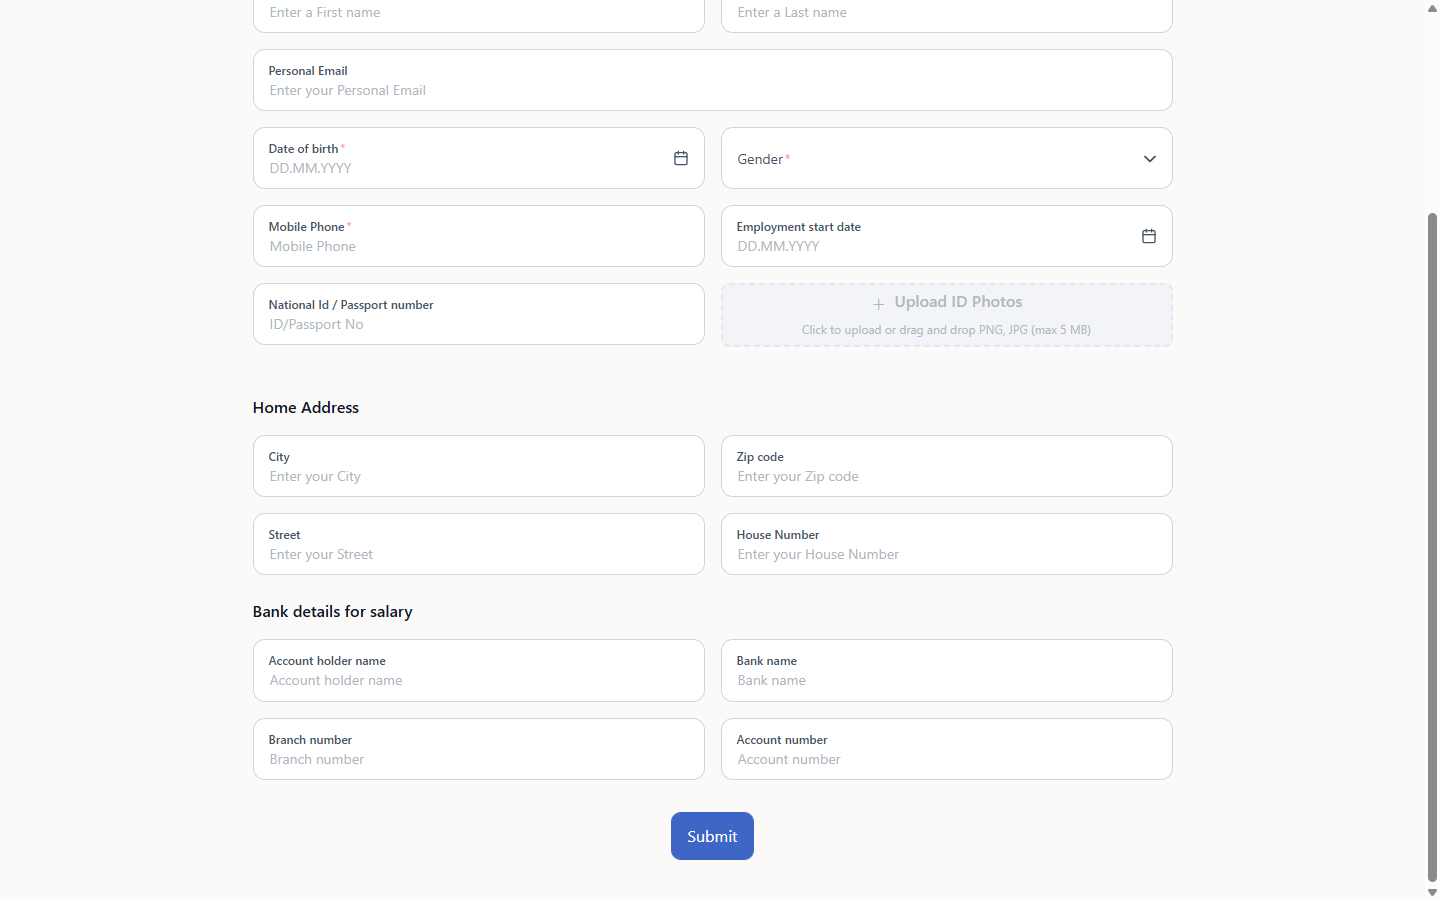
Home address - city, zip code, street and house number.
Bank details for salary - account holder name, bank name, branch number and account number.
Step 3 - Review the new employee
When the employee clicks Submit, they are added to the Users list and highlighted in yellow. Open the user to check the details and finish the setup. See How to Add a New Employee or Remove an Existing One.
FAQ
Which plans include the self-registration link?
All TimeClock 365 plans.
How do I know someone has registered?
New self-registered employees appear in the Users list highlighted in yellow.
Need help? Open a support ticket.