
If something on the clock doesn't seem right - the screen, sound, keys or fingerprint sensor - the built-in AutoTest checks each part for you.
This guide is for TimeClock 365 biometric clocks with a 2.8, 3 or 3.5-inch color screen. Menu names can differ slightly between models and firmware versions.
Run a test
- Press M/OK on the main screen.
- Press ► to select AutoTest and press OK.
- Press ▼ to choose a test and press OK.
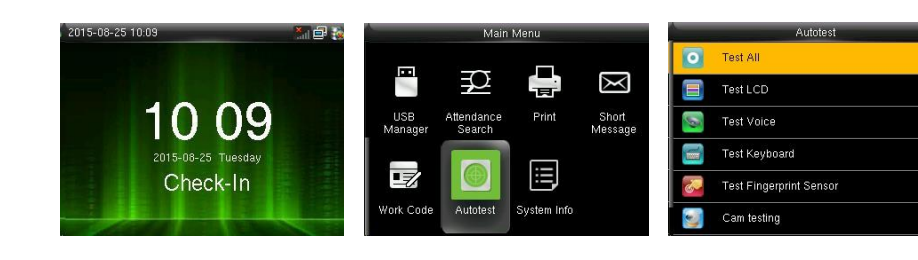
The tests
- Test All - runs the screen, voice, sensor, keypad and clock tests one after another. Press OK to continue and ESC to exit.
- Test LCD - shows full color, pure white and pure black screens so you can check the display.
- Test Voice - plays the clock's voice files to check the sound.
- Test Keyboard - press each key; it turns blue on screen if it works.
- Test Fingerprint Sensor - place a finger on the sensor and check the image on screen is clear.
- Test Camera (models with a camera) - checks the camera images.
- Test Clock RTC - touch the screen to start and stop a stopwatch to check the internal clock.
Press ESC to exit any test. If a test fails, open a support ticket and include the clock's serial number - see Biometric Clock System Information and Factory Reset.
FAQ
How do I check if the fingerprint sensor is working?
Press M/OK, select AutoTest, then Test Fingerprint Sensor. Place a finger on the sensor - if the fingerprint image appears clearly on screen, the sensor works.
What should I do if a test fails?
Open a support ticket with the result and the clock's serial number from System Info > Device Info.
Need help? Open a support ticket.